lincoln electric ac 225 arc welder manual

Welcome to the Lincoln Electric AC-225 Arc Welder, a reliable and versatile tool designed for professional and amateur welders alike. This compact stick welder offers a smooth AC arc, making it ideal for welding various materials, including steel, stainless steel, and cast iron. Known for its durability and consistent performance, the AC-225 is a popular choice for repair, maintenance, and fabrication projects. This guide provides a detailed overview of its features, operation, and safety tips to help you get the most out of your welding experience.
Overview of the AC-225 Welder
The Lincoln Electric AC-225 Arc Welder is a compact and versatile stick welding machine designed for a wide range of applications. It offers a smooth AC arc, making it suitable for welding materials like carbon steel, stainless steel, and cast iron. With a broad amperage range of 40-225 amps, it can handle various thicknesses of metal, from 16 gauge and heavier. The welder is ideal for repair, maintenance, fabrication, and hardfacing tasks. Its traditional design ensures durability and low-cost operation, while the compact size allows for easy storage and portability. The AC-225 comes with a 6-foot input power cable and NEMA 6-50P plug, making it easy to set up and use. Accessories like a carbon arc welding torch add to its versatility, enabling tasks such as brazing and metal bending. This welder is UL listed and CSA approved, ensuring safety and reliability for professional and amateur welders alike.
Importance of the Manual for Safe and Effective Use
The manual for the Lincoln Electric AC-225 Arc Welder is essential for ensuring safe and effective operation. It provides detailed guidelines for setup, operation, and maintenance, helping users avoid potential hazards. The manual outlines proper electrode selection, current settings, and safety precautions to prevent accidents. By following the manual, users can optimize the welder’s performance for various materials and thicknesses. It also covers troubleshooting common issues and routine maintenance tasks to extend the machine’s lifespan. Reading and understanding the manual is crucial for beginners and experienced welders alike to operate the AC-225 safely and efficiently. Always refer to the manual before starting any welding project to ensure compliance with safety standards and manufacturer recommendations.
Key Specifications of the Lincoln Electric AC-225
The Lincoln Electric AC-225 features a 40-225 amp welding range, 230/1/60 Hz input power, and dimensions of 22.5 x 10.5 x 16.5 inches. It weighs 108 lbs and delivers smooth AC arcs for versatile welding applications.
Input Power Requirements
The Lincoln Electric AC-225 Arc Welder requires a 230V, 1-phase power supply at 60 Hz. It has a maximum input current of 63 amps and uses a NEMA 6-50P plug for connection. Ensure the power source matches these specifications to avoid damage. The welder is designed for efficient operation in standard electrical environments, making it suitable for most workshops or job sites. Always verify the electrical supply meets the welder’s requirements before use to ensure safe and reliable performance. Proper power setup is crucial for maintaining the welder’s durability and functionality. Refer to the manual for detailed electrical connection guidelines and safety precautions.
Output Range and Amperage Capabilities
The Lincoln Electric AC-225 Arc Welder offers a broad output range of 40 to 225 amps, providing flexibility for various welding tasks. This range allows users to handle thin materials like 16-gauge steel and thicker materials with ease. The welder delivers a smooth AC arc, ensuring consistent weld quality across different amperage settings. The 225-amp maximum output is suitable for 3/16-inch general-purpose electrodes, while lower settings are ideal for precision work. This versatility makes the AC-225 suitable for applications ranging from small repairs to heavy-duty fabrication. The amperage selector switch simplifies adjusting the current, enabling precise control for optimal results. This wide range ensures the welder adapts to diverse project requirements, making it a reliable choice for both professionals and hobbyists.
Dimensions and Weight
The Lincoln Electric AC-225 Arc Welder is designed to be compact and portable, measuring 50 inches in height, 38.5 inches in width, and 23 inches in depth. Weighing approximately 108 pounds, it is lightweight enough for easy transport to job sites or workshops. Its compact size allows for convenient storage without occupying excessive space. Despite its portability, the welder is built with durability in mind, featuring a robust construction that withstands regular use. The dimensions and weight make it an ideal choice for both mobile professionals and those with limited workspace. This balance of portability and sturdiness ensures the AC-225 is both practical and reliable for a variety of welding applications.
Core Features of the AC-225 Welder
The AC-225 welder features a smooth AC arc for versatile welding, compatibility with various materials, optional accessories for enhanced functionality, and a durable design ensuring long-term reliability and performance.
Smooth AC Arc for Versatile Welding
The Lincoln Electric AC-225 produces a smooth AC arc, ideal for welding diverse materials like carbon steel, stainless steel, and cast iron. This consistent arc ensures strong, clean joints, reducing spatter and porosity. The welder’s AC output provides excellent penetration and bead appearance, making it suitable for various thicknesses of metal. Its versatility allows the use of different electrodes, including mild steel, stainless steel, and hardfacing, delivering reliable results across applications. Whether for repair work, fabrication, or maintenance, the AC-225’s smooth arc contributes to precise control and professional-grade welds, enhancing efficiency and productivity for both novice and experienced welders.
Material Compatibility
The Lincoln Electric AC-225 Arc Welder is designed to work seamlessly with a wide range of materials, including carbon steel, low alloy steels, stainless steel, and cast iron. Its smooth AC arc ensures clean fusion and minimal impurities, making it ideal for welding metals 16 gauge and heavier. The welder is compatible with various electrode types, such as mild steel, low hydrogen, stainless steel, and hardfacing electrodes, allowing for versatility in different welding applications. This compatibility ensures strong, durable welds across various material thicknesses, making the AC-225 suitable for repair, fabrication, and maintenance projects. Its ability to handle diverse materials with precision and consistency makes it a reliable choice for both professionals and enthusiasts.
Accessories and Optional Equipment
The Lincoln Electric AC-225 Arc Welder can be enhanced with a variety of accessories to improve functionality and versatility. A wheel kit is available for easy mobility, allowing users to move the welder around the workshop or job site effortlessly. Additionally, a carbon arc welding torch can be purchased for tasks such as brazing, soldering, and heating metal. Other optional equipment includes a lightweight headshield with interchangeable lenses, ensuring optimal visibility and protection during welding. Insulated electrode holders and cables are also available for extended durability and safety; These accessories expand the welder’s capabilities, making it a comprehensive tool for diverse welding and metalworking applications. Refer to the manual or Lincoln Electric’s official website for a full list of compatible accessories.
Safety Guidelines and Precautions
Always follow safety guidelines to ensure a safe working environment. Avoid welding in damp locations or while wearing wet clothing. Keep the area clear of flammable materials.
General Safety Tips for Arc Welding
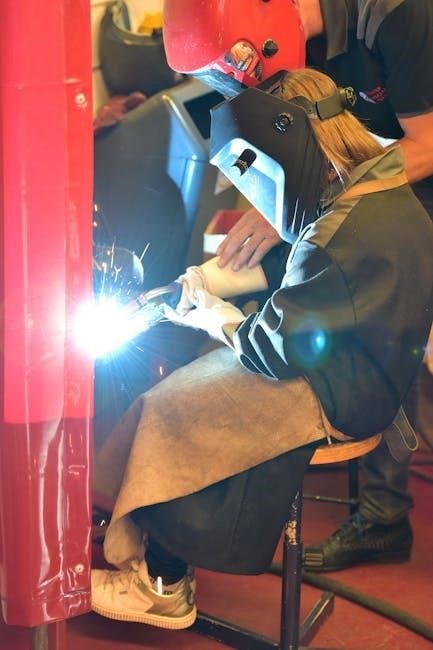
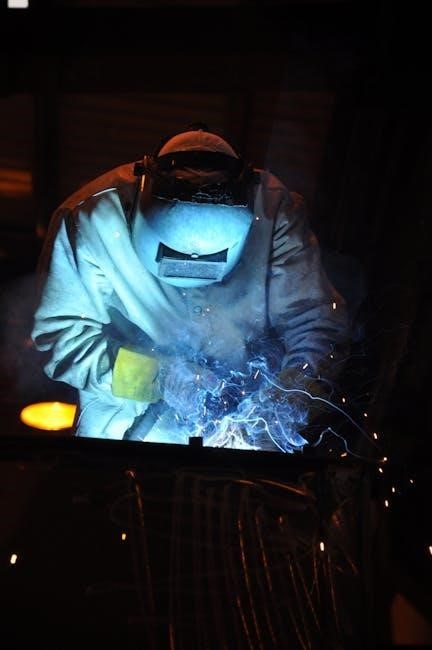
Always follow safety guidelines to minimize risks while using the Lincoln Electric AC-225 Arc Welder. Wear proper personal protective equipment, including a welding helmet, gloves, and safety glasses, to protect yourself from sparks and UV radiation. Ensure the workspace is well-ventilated to avoid inhaling fumes. Keep flammable materials away from the welding area. Avoid welding in damp locations or while wearing wet clothing, as this increases the risk of electric shock. Never weld near open flames or sparks. Use a fire extinguisher nearby and ensure it is easily accessible. Keep children and unauthorized individuals away from the welding area. Regularly inspect the welder and cables for damage to prevent accidents. Follow the manufacturer’s instructions for setup, operation, and maintenance to ensure safe and effective use of the AC-225 welder.
Personal Protective Equipment (PPE)
Wearing proper personal protective equipment (PPE) is essential when operating the Lincoln Electric AC-225 Arc Welder. A welding helmet with a shaded lens is crucial to protect your eyes from harmful UV and infrared radiation emitted during the welding process. Heat-resistant gloves should be worn to prevent burns from sparks and hot metal. Safety glasses or goggles provide additional eye protection when not wearing a helmet. Fire-resistant clothing, such as a welding jacket or apron, helps safeguard against sparks and spatter. Ensure all PPE meets industry safety standards to effectively protect against welding hazards. Proper ventilation in the workspace is also recommended to avoid inhaling fumes. Always prioritize PPE to maintain a safe and protected welding environment.
Environmental and Electrical Safety Considerations
Always operate the Lincoln Electric AC-225 in a well-ventilated area to prevent inhalation of welding fumes. Ensure the workspace is free from flammable materials, such as gasoline or paint, to minimize fire hazards. Keep the welder on a stable, non-conductive surface and avoid using it in damp environments or while wearing wet clothing. Regularly inspect the power cord and connections for damage to prevent electrical shocks. Use circuit breakers or fuses rated for the welder’s input power to avoid electrical overload. Proper grounding of the equipment is essential to ensure operator safety. Additionally, avoid welding in confined spaces without adequate ventilation to prevent the accumulation of harmful gases. Always adhere to local safety regulations and guidelines when operating the AC-225 to protect both the operator and the environment.

Setting Up the AC-225 Welder
Begin by unpacking and inspecting the welder for damage. Connect the appropriate power source, ensuring compatibility with the unit’s voltage and amperage requirements. Prepare a clean, dry workspace away from flammable materials. Ensure all cables and electrodes are securely connected. Follow the manual’s guidelines for proper setup to ensure safe and efficient operation.
Unpacking and Initial Inspection
Begin by carefully unpacking the Lincoln Electric AC-225 Arc Welder from its shipping container. Inspect the unit for any visible damage or defects that may have occurred during transit. Verify that all components, such as the power source, electrode holder, cables, and accessories, are included and undamaged. Check the compliance plate to ensure the voltage and amperage ratings match your power supply. Before plugging in, ensure the welder is placed on a stable, dry surface away from flammable materials. Refer to the manual for specific unpacking instructions and safety precautions to avoid potential hazards. This step ensures safe and proper setup for optimal performance.
Connecting the Power Source
To connect the Lincoln Electric AC-225 Arc Welder, ensure the power source matches the unit’s requirements. The welder operates on 230/1/60 Hz power, with a maximum input current of 63 amps. Locate a suitable 240V NEMA 6-50R receptacle or use the provided 6-50P plug. Before plugging in, confirm the work area is dry and free from flammable materials. Avoid using extension cords unless necessary, and ensure they are rated for the welder’s current. Never modify the plug or cable, as this could cause electrical hazards. Once connected, double-check all connections for security. Refer to the manual for specific electrical requirements and safety guidelines to ensure safe and proper installation. Proper grounding is essential for safe operation.
Preparing the Workspace
Before operating the Lincoln Electric AC-225 Arc Welder, ensure the workspace is clean, well-ventilated, and free from flammable materials. Clear the area of any combustible substances, such as wood shavings or chemicals, to minimize fire risks. Position the welder on a stable, heat-resistant surface, away from direct sunlight or moisture. Ensure proper grounding to prevent electrical hazards. Keep a fire extinguisher nearby and wear appropriate personal protective equipment, including safety glasses and welding gloves. Organize your tools and materials within easy reach to maintain efficiency. Verify that all electrical connections are secure and meet safety standards. A well-prepared workspace ensures a safer and more productive welding experience. Always follow safety guidelines outlined in the manual to avoid accidents. Proper setup is key to achieving optimal results with the AC-225 welder.

Operating the AC-225 Welder
The Lincoln Electric AC-225 Arc Welder delivers a smooth AC arc, ideal for consistent welding. Its 40-225 amp range accommodates various electrodes, ensuring versatility for different materials.
Step-by-Step Welding Process
Operating the Lincoln Electric AC-225 Arc Welder involves a straightforward process to ensure safe and effective welding. Begin by selecting the appropriate electrode and setting the current using the amperage selector switch. Always wear proper PPE, including a welding helmet, gloves, and safety glasses. Strike the arc by touching the electrode to the workpiece and lifting it slightly to maintain the arc length. Move the electrode steadily along the joint, keeping the arc consistent for even penetration. Use a push or drag technique depending on the material and desired outcome. After completing the weld, allow the workpiece to cool before handling. Practice proper slag removal for shielded electrodes and inspect the weld for quality. Adjust settings as needed for different materials or thicknesses.
Current Selection and Electrode Matching
Selecting the correct welding current and electrode is crucial for achieving high-quality welds with the Lincoln Electric AC-225. The welder’s amperage range of 40-225 amps allows flexibility for various materials and thicknesses. Refer to the electrode selection guide in the manual to match the electrode type and size with the appropriate current setting. Use the selector switch to set the desired output amperes, ensuring compatibility with the electrode diameter. For example, 3/16″ (4.8mm) mild steel electrodes require higher current, while smaller electrodes like 5/32″ (4.0mm) need lower settings. Proper current and electrode matching ensures optimal arc stability, penetration, and weld appearance. Always consult the manual for specific recommendations to achieve the best results for your welding project.
Techniques for Different Materials
The Lincoln Electric AC-225 Arc Welder excels at welding various materials, including steel, stainless steel, and cast iron. For steel, use E6010 or E7018 electrodes, maintaining a consistent arc length to ensure penetration and fusion. When welding stainless steel, choose E308 or E316 electrodes and reduce the current slightly to prevent warping. Cast iron requires E6012 or E7018 electrodes, with a slower travel speed to avoid cracking. Always adjust the welding current based on material thickness and type. Proper electrode angle and arc control are essential for clean, strong welds. Refer to the manual for specific electrode recommendations and welding techniques tailored to your material. This ensures optimal results and minimizes defects during the welding process.

Maintenance and Troubleshooting
Regular maintenance ensures optimal performance. Clean the welder, inspect cables, and replace worn parts. Troubleshoot common issues like poor weld quality or arc instability promptly for reliability.
Routine Maintenance Tasks
Regular maintenance is crucial for ensuring the Lincoln Electric AC-225 Arc Welder operates safely and efficiently. Start by visually inspecting the welder for any signs of wear or damage. Clean the exterior and internal components to prevent dust buildup, which can affect performance. Check the power cord, electrode holder, and cables for frays or cuts, and replace them if necessary. Lubricate moving parts periodically to maintain smooth operation. Inspect the welding terminals and ensure they are secure and free of corrosion. Additionally, check the cooling system for proper function and clean the fan if needed. Always follow the manufacturer’s recommendations for part replacements and maintenance schedules to preserve the welder’s longevity and reliability. Regular upkeep helps prevent unexpected issues and ensures consistent welding results.
Common Issues and Solutions
Common issues with the Lincoln Electric AC-225 Arc Welder include poor arc performance, overheating, and power supply problems. For poor arc performance, check the electrode condition, ensure proper electrode-to-workpiece contact, and verify that the welding current is set correctly. Overheating can occur if the welder is used beyond its duty cycle; allow it to cool before resuming work. Power issues may arise from incorrect voltage settings or loose connections. Ensure the welder is plugged into a dedicated 230V or 220V circuit, and all terminals are secure. If problems persist, consult the manual or contact Lincoln Electric support for assistance. Regular maintenance, such as cleaning and inspecting components, can help prevent these issues and ensure optimal performance.
Storage and Long-Term Care
Proper storage and long-term care are essential to maintain the Lincoln Electric AC-225 Arc Welder’s performance and longevity. Store the welder in a dry, cool, and well-ventilated area, away from direct sunlight and moisture. Avoid storing it in harsh environments, such as damp basements or areas exposed to chemicals. Before storage, clean the welder thoroughly, removing dirt and debris from the exterior and internal components. Apply a protective coating to metal parts to prevent rust. Disconnect the power cord and store it separately to avoid damage. For extended storage, consider using a cover to protect against dust. Regularly inspect stored components for signs of wear or damage. Follow the manufacturer’s guidelines for long-term storage to ensure the welder remains in optimal condition when ready for use.
Warranty and Manufacturer Support
The Lincoln Electric AC-225 Arc Welder is backed by a 3-year warranty on parts and labor, ensuring reliability and customer satisfaction. Lincoln Electric provides dedicated support through their website, manuals, and customer service team, offering resources and assistance for optimal performance and troubleshooting. Contact their headquarters in Cleveland, OH, for inquiries or additional support needs.
Warranty Coverage and Terms
The Lincoln Electric AC-225 Arc Welder is protected by a comprehensive 3-year warranty covering both parts and labor. This warranty ensures that any defects in materials or workmanship are addressed promptly, providing users with peace of mind. The warranty period begins from the date of purchase and is subject to proper use and maintenance of the equipment. For detailed terms and conditions, refer to the official manual or contact Lincoln Electric’s customer service. The company also offers extended support through its website, including downloadable resources and troubleshooting guides, to help users maintain their welder’s performance and resolve any issues efficiently.
Contacting Lincoln Electric for Assistance
For any inquiries or support regarding the AC-225 Arc Welder, Lincoln Electric provides multiple avenues for assistance. Users can contact their customer service team directly via phone at 216.481.8100 or visit their official website at www.lincolnelectric.com. Additionally, the company offers downloadable resources, including manuals and troubleshooting guides, to help resolve common issues. Lincoln Electric’s headquarters is located at 22801 St. Clair Ave., Cleveland, OH 44117-1199. Their dedicated support team ensures that customers receive timely and effective solutions, maintaining the high standards of service that Lincoln Electric is known for in the welding industry.
Additional Resources and Downloads
Lincoln Electric offers a variety of resources to support the AC-225 Arc Welder, including downloadable manuals, technical specifications, and safety guidelines. Users can access the official Lincoln Electric website to download the complete operator’s manual, which provides detailed instructions for setup, operation, and maintenance. Additional resources include electrode selection guides, troubleshooting tips, and warranty information. A free copy of the Arc Welding Safety booklet E205 is also available, emphasizing safe practices for welders. For further assistance, visit the Lincoln Electric support page or contact their customer service team directly at 216.481.8100. These resources ensure users can maximize the performance and safety of their AC-225 welder.
The Lincoln Electric AC-225 Arc Welder is a reliable, versatile tool for various welding tasks, offering smooth performance and durability. Always prioritize safety and proper maintenance for optimal results.
The Lincoln Electric AC-225 Arc Welder is a versatile and reliable tool for welding various materials, including steel, stainless steel, and cast iron. With a broad amperage range of 40-225 amps, it delivers a smooth AC arc for consistent results. Its compact design makes it easy to handle and store, while its durability ensures long-term performance. Ideal for repair, fabrication, and maintenance tasks, the AC-225 is a popular choice for both professionals and hobbyists. Accessories like the carbon arc welding torch enhance its versatility. Always follow safety guidelines and maintenance recommendations to maximize efficiency and safety. This welder is a dependable option for achieving high-quality welds across diverse applications.
Encouragement for Safe and Effective Welding
Always prioritize safety and proper technique when using the Lincoln Electric AC-225 Arc Welder. Wear appropriate PPE, including a welding helmet, gloves, and protective clothing, to safeguard against arc exposure. Follow the manual’s guidelines for setup, operation, and maintenance to ensure optimal performance. Practice welding on scrap metal to refine your skills and achieve consistent results. Keep the workspace clean and well-ventilated to prevent hazards. By adhering to safety protocols and recommended practices, you can maximize the welder’s capabilities and enjoy a reliable, efficient welding experience. Remember, safety and skill go hand in hand in producing high-quality welds with the AC-225.