bella coffee maker instructions

Bella Coffee Maker Instructions: A Comprehensive Guide

Welcome! This detailed manual provides essential guidance for operating your Bella Coffee Maker‚ ensuring a delightful brewing experience and maximizing its potential.

Congratulations on choosing a Bella Coffee Maker! We designed this appliance to deliver consistently delicious coffee with ease and convenience. This introduction serves as your starting point‚ outlining the core features and benefits you’ll enjoy. Your new coffee maker is engineered for reliable performance‚ blending sleek design with user-friendly operation.

This guide is structured to provide a comprehensive understanding‚ from initial setup and daily brewing to cleaning and troubleshooting. We’ll cover everything you need to know to unlock the full potential of your Bella Coffee Maker. Prepare to elevate your morning routine and savor the perfect cup‚ brewed exactly to your liking. Enjoy the journey of discovering all that your new appliance has to offer!

Unboxing and Component Identification

Carefully unpack your Bella Coffee Maker and verify that all components are present. The box should contain the main coffee maker unit‚ a glass carafe‚ a removable filter basket‚ and the water reservoir. Inspect each item for any signs of damage during shipping. If anything is missing or damaged‚ please contact customer support immediately – details are found later in this manual.

Familiarize yourself with each part before proceeding. The carafe is designed for serving and is typically made of heat-resistant glass. The filter basket holds the coffee filter and grounds. The water reservoir provides the water supply for brewing. Proper identification of these components is crucial for successful operation and maintenance. Retain the original packaging for potential future transport or warranty claims.

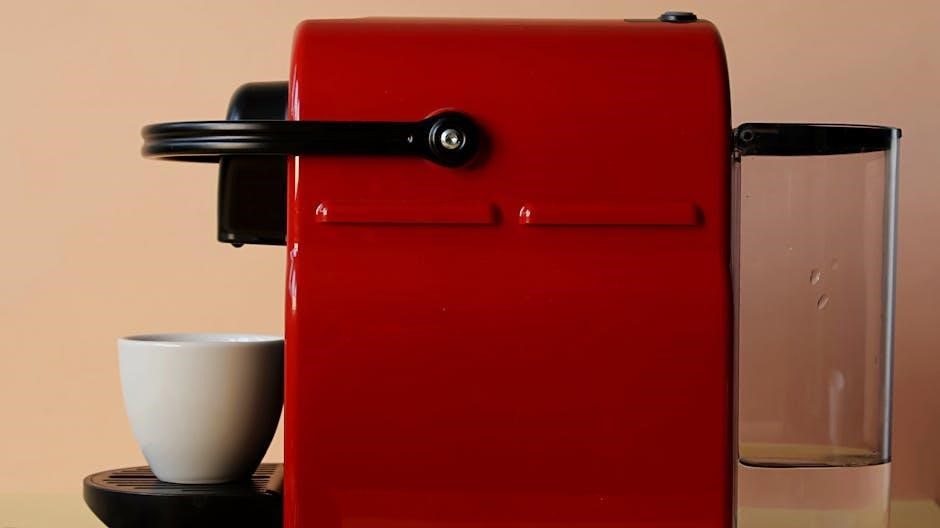
Parts List: Carafe‚ Filter Basket‚ Water Reservoir

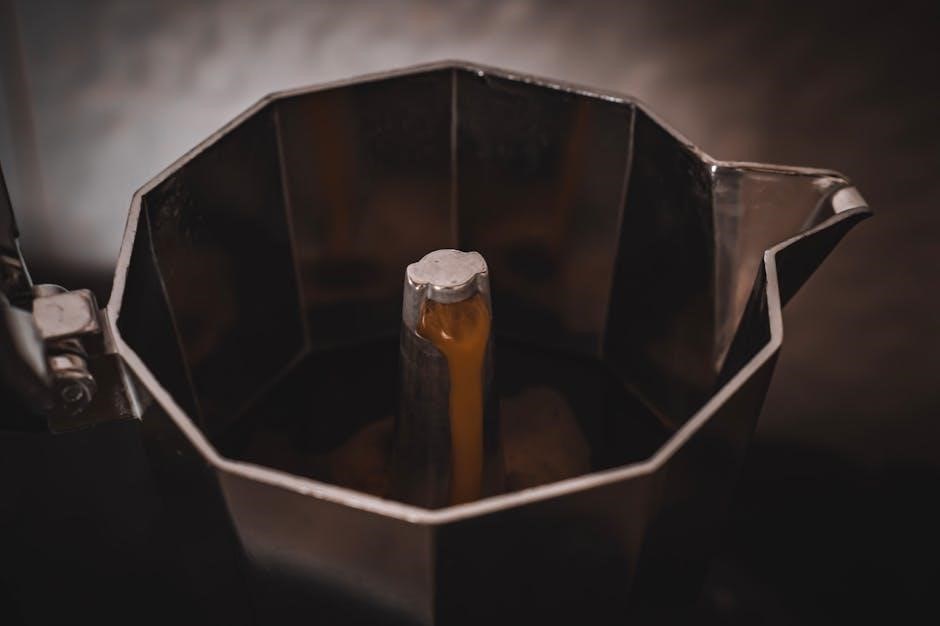
Let’s detail each component. The Carafe‚ usually glass‚ collects the brewed coffee. Handle with care as it becomes hot during and after brewing. The Filter Basket‚ a removable plastic component‚ securely holds a paper filter or a reusable filter (sold separately) containing your coffee grounds. Ensure it’s properly seated before brewing to prevent overflows.

The Water Reservoir‚ typically plastic and marked with water level indicators‚ supplies water for the brewing process. Fill it with fresh‚ cold water to the desired level – do not exceed the maximum fill line. These three parts work in harmony to deliver your perfect cup. Familiarity with each part ensures proper assembly and operation of your Bella Coffee Maker.

Safety Precautions & Important Warnings

Prioritize safety! Always ensure the coffee maker is placed on a stable‚ heat-resistant surface. Never operate the appliance with a damaged cord or plug. Avoid immersing the coffee maker base in water or any other liquid; Hot surfaces‚ like the carafe and warming plate‚ require careful handling to prevent burns – use oven mitts!

Keep the appliance out of reach of children. Unplug the coffee maker before cleaning and allow it to cool completely. Do not use abrasive cleaners‚ as they can damage the surface. This appliance is for household use only. Read all instructions before use and retain this manual for future reference. Ignoring these warnings could result in injury or damage.

Initial Setup: Before First Use

Prepare for brewing! Before enjoying your first cup‚ proper initial setup is crucial. Begin by removing all packaging materials and ensuring all components are present. Carefully inspect the coffee maker for any visible damage. It’s essential to thoroughly clean the unit to remove any manufacturing residue. This ensures a pure coffee flavor from the start.

The next step involves priming the system. This process removes any potential dust or debris accumulated during storage. Run a full brewing cycle with water only – no coffee grounds! This initial flush prepares the coffee maker for optimal performance. Following these steps guarantees a clean and flavorful coffee experience right from the beginning.

Cleaning the Coffee Maker

Maintaining freshness! Regular cleaning is vital for optimal performance and longevity. After each use‚ discard used coffee grounds and rinse the filter basket and carafe with warm‚ soapy water. Ensure all soap residue is removed to prevent off-flavors. The carafe and filter basket are typically dishwasher safe (top rack recommended)‚ but check your model’s specific instructions.

Wipe down the exterior of the coffee maker with a damp cloth. Avoid abrasive cleaners‚ as they can damage the finish. Periodically‚ wash the water reservoir with mild soap and water. A clean coffee maker delivers the purest coffee taste‚ so consistent cleaning is highly recommended for a consistently enjoyable brewing experience.

Priming the System (Running Water Only)

Initial flush is key! Before brewing your first pot of coffee‚ it’s crucial to prime the system. This removes any residual manufacturing dust or debris that may affect the taste of your coffee. Fill the water reservoir to its maximum capacity with fresh‚ filtered water.

Place the carafe securely on the warming plate. Without adding any coffee grounds or a filter‚ run a full brewing cycle. Discard the water from the carafe after the cycle completes. Repeat this process at least twice‚ or until the water runs clear. This ensures a clean‚ fresh start for your Bella Coffee Maker‚ guaranteeing the best possible flavor in every cup.

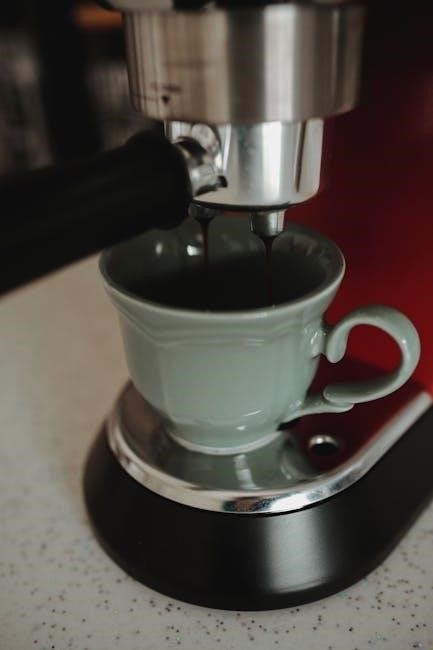
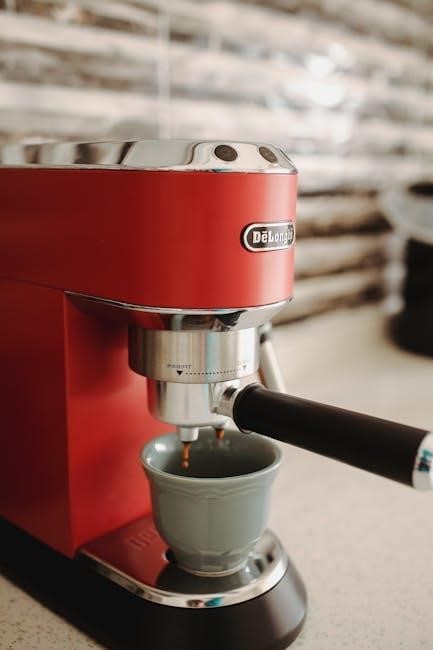
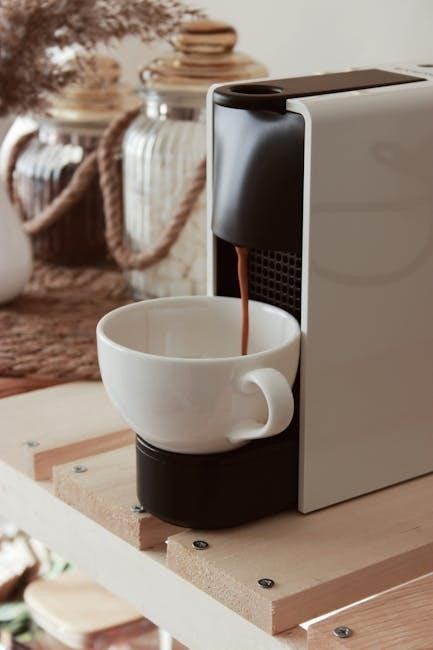
Brewing Coffee: Step-by-Step Instructions

Let’s brew! Begin by ensuring your Bella Coffee Maker is clean and primed. Open the filter basket and insert a paper filter or your reusable filter. Add your desired amount of ground coffee – refer to the ‘Coffee to Water Ratio’ section for optimal measurements.

Fill the water reservoir with the appropriate amount of fresh‚ cold water‚ using the water level markings as a guide. Place the carafe securely on the warming plate. Press the power button to begin the brewing cycle. The indicator light will illuminate‚ signaling the process has started. Once brewing is complete‚ the coffee maker will automatically keep your coffee warm. Enjoy!

Understanding the Control Panel

Navigating the features! Your Bella Coffee Maker’s control panel is designed for intuitive operation. The Power Button is prominently located and initiates the brewing cycle when pressed. A corresponding Indicator Light illuminates to confirm the unit is on and actively brewing‚ providing clear visual feedback.

For convenient‚ pre-programmed brewing‚ explore the Auto-Brew Function. This allows you to set a specific time for your coffee to automatically brew‚ ensuring a fresh pot is ready when you wake up or return home. Detailed instructions for programming this feature are provided in the dedicated section. Familiarizing yourself with these controls unlocks the full potential of your coffee maker.

Power Button & Indicator Light

Essential controls for brewing! The Power Button serves as the primary on/off switch for your Bella Coffee Maker. A single press initiates the brewing process‚ activating the internal heating element and pump. It’s conveniently positioned for easy access;

Accompanying the Power Button is the Indicator Light‚ a crucial visual cue. When illuminated‚ it confirms the coffee maker is receiving power and actively brewing. The light typically remains on throughout the brewing cycle and may switch off automatically once brewing is complete‚ or some models maintain illumination during the keep-warm phase. Observing the indicator light ensures proper operation and provides immediate feedback on the brewing status.

Programming the Auto-Brew Function

Wake up to fresh coffee! The Auto-Brew function allows you to pre-set a brewing time‚ ensuring a hot pot of coffee awaits you each morning. Begin by pressing the “Program” or “Auto” button – consult your specific model’s control panel. Then‚ use the “Hour” and “Minute” buttons to set your desired brew start time.

Confirm your selection by pressing the “Program” button again. The indicator light will illuminate‚ signaling the Auto-Brew function is activated. Ensure the coffee maker is filled with water and grounds before bedtime! To deactivate‚ simply press the “Program” button once more. This feature offers convenience and a consistently delicious start to your day.

Using Filters: Paper vs. Reusable

Choosing the right filter is key! Your Bella Coffee Maker accommodates both paper filters and reusable filters‚ each offering unique benefits. Paper filters are disposable‚ providing a clean and simple brewing experience with no lingering coffee oils. They generally produce a cleaner‚ brighter cup of coffee. Ensure you use the correct size – typically a cone or basket style‚ depending on your model.

Reusable filters‚ often made of nylon or stainless steel‚ are an eco-friendly and cost-effective option. They allow more coffee oils to pass through‚ resulting in a richer‚ fuller-bodied flavor. Remember to thoroughly clean your reusable filter after each use to prevent buildup and maintain optimal performance. Both options deliver excellent results!

Coffee to Water Ratio: Achieving Optimal Flavor

Perfecting your brew starts with the ratio! For a consistently delicious cup of coffee with your Bella Coffee Maker‚ a general guideline is two tablespoons of ground coffee per six ounces of water. However‚ this is a starting point – adjust to your personal preference!

Experimentation is encouraged! If your coffee tastes too weak‚ increase the amount of coffee grounds. For a bolder flavor‚ add more coffee. Conversely‚ if it’s too strong‚ reduce the grounds. Using a kitchen scale for precise measurements ensures consistency. Remember that the type of coffee (light‚ medium‚ or dark roast) also influences the ideal ratio. Find your sweet spot for a truly satisfying experience!

Cleaning and Maintenance

Regular cleaning extends your Bella Coffee Maker’s life and ensures optimal performance! After each use‚ promptly discard used coffee grounds and rinse the carafe‚ filter basket‚ and any removable parts with warm‚ soapy water. Avoid abrasive cleaners‚ as they can damage the surfaces.

Beyond daily rinsing‚ descaling is crucial. Mineral buildup from water can affect brewing quality and efficiency. Descale every 1-3 months‚ depending on water hardness‚ by running a mixture of equal parts white vinegar and water through a full brewing cycle. Follow with two cycles of fresh water to rinse thoroughly. A clean coffee maker means a better tasting brew‚ consistently!

Daily Cleaning Procedures

Maintaining your Bella Coffee Maker daily is simple and vital! Immediately after brewing‚ unplug the unit and allow it to cool completely. Carefully remove the filter basket and discard the used coffee grounds and paper filter (if used). Rinse both the filter basket and the carafe with warm‚ soapy water.

Don’t forget the exterior! Wipe down the coffee maker’s housing with a damp cloth to remove any spills or splatters. Ensure no water enters the machine’s internal components. A quick daily clean prevents buildup and ensures consistently fresh-tasting coffee. Avoid using abrasive cleaners‚ opting for mild dish soap instead for optimal results.

Descaling the Coffee Maker (Removing Mineral Buildup)

Over time‚ mineral deposits can accumulate‚ affecting performance. Descale your Bella Coffee Maker every 1-3 months‚ depending on water hardness. Mix equal parts white vinegar and water‚ filling the water reservoir. Run a full brewing cycle without coffee grounds.

Repeat this process with fresh water two to three times to thoroughly rinse away any remaining vinegar taste and odor. This ensures your coffee isn’t affected. Descaling restores optimal brewing temperature and extends the life of your appliance. Ignoring buildup can lead to slower brewing and potential damage – preventative maintenance is key!

Troubleshooting Common Issues

Encountering problems? Don’t worry‚ many are easily resolved. If your Bella Coffee Maker isn’t turning on‚ check the power cord connection and ensure the outlet is working. For slow brewing or no brewing‚ confirm the water reservoir is filled and the filter basket is correctly inserted.

Mineral buildup can also cause these issues – descaling (see maintenance section) is recommended. If the coffee tastes weak‚ adjust the coffee-to-water ratio. A clogged filter can also impact flavor. Always unplug the coffee maker before attempting any troubleshooting steps. If problems persist‚ consult the warranty information for support options.

Coffee Maker Not Turning On

Is your Bella Coffee Maker unresponsive? First‚ verify the power cord is securely plugged into both the coffee maker and a functioning wall outlet. Test the outlet with another appliance to confirm it’s providing power. Check the coffee maker’s power switch; ensure it’s fully engaged.

Sometimes‚ a tripped circuit breaker can be the culprit – check your home’s electrical panel. If the issue persists after these checks‚ there might be an internal problem. Do not attempt to disassemble the unit yourself. Contact Bella customer support or refer to the warranty information for assistance and potential repair options.

Coffee Brewing Too Slowly or Not at All

Experiencing slow brewing or a complete stop? Mineral buildup is a common cause. Descale your coffee maker regularly‚ as outlined in the ‘Cleaning and Maintenance’ section. Ensure the water reservoir is filled to the appropriate level – too little or too much can affect brewing.

Also‚ check the filter basket. A clogged filter‚ whether paper or reusable‚ restricts water flow. Use the correct filter type and ensure it’s properly seated. Verify the carafe is correctly positioned on the warming plate; If problems continue‚ contact Bella customer support for further troubleshooting or potential repair guidance.

Warranty Information & Customer Support

Your Bella Coffee Maker is covered by a one-year limited warranty against defects in materials and workmanship from the date of purchase. This warranty does not cover damage resulting from misuse‚ accidents‚ or unauthorized repairs. Please retain your proof of purchase for warranty claims.

For customer support‚ visit our website at [insert website address here] for FAQs‚ troubleshooting guides‚ and contact information. You can also reach our dedicated support team by phone at [insert phone number here] during business hours. We are committed to providing excellent assistance and ensuring your satisfaction with your Bella product.

blundstones size guide

Blundstone, established in 1870 in Tasmania, Australia, has become a globally respected footwear brand known for durability. These versatile boots, favored for work and leisure, require careful sizing for optimal comfort and performance.

Brief History of the Brand

Blundstone’s roots trace back to 1870 in Hobart, Tasmania, Australia, initially as a manufacturer of durable work boots for the harsh Australian landscape. The company’s lineage, however, extends further, with the Blanch family’s involvement in bootmaking beginning in the 1840s. For generations, Blundstone focused on providing robust footwear for farmers, miners, and laborers.

The iconic elastic-sided Chelsea boot design, which Blundstone is now synonymous with, gained prominence in the early 20th century. This style offered practicality and ease of wear, quickly becoming a staple for Australian workers. Post-World War II, the brand underwent significant modernization and expansion, solidifying its reputation for quality and resilience.

Today, still family-owned, Blundstone boots are sold worldwide, transcending their workwear origins to become a fashion statement. Their enduring appeal lies in their blend of heritage, functionality, and timeless style, making proper fit crucial for enjoying their full benefits.

Why Blundstone Sizing is Important

Blundstone boots are renowned for their comfort and durability, but achieving this relies heavily on selecting the correct size. Unlike standard footwear, Blundstone’s construction and intended use demand a precise fit. A poorly sized boot can lead to discomfort, blisters, and reduced performance, especially during extended wear.

The unique elastic side panels, while offering convenience, require a snug fit to provide adequate support and prevent slippage. Too much space results in instability, while a boot that’s too tight restricts circulation and causes pain. Understanding that Blundstone sizing can differ from other brands is crucial.

Investing in properly fitted Blundstone boots ensures long-term enjoyment and maximizes their value. Taking the time to accurately measure your feet and consult the brand’s sizing guides is a worthwhile investment, guaranteeing a comfortable and reliable experience with these iconic boots.

Understanding Blundstone Sizing Systems

Blundstone utilizes both Australian and international (US/UK) sizing standards. Accurate foot measurement is vital, as sizing can vary between regions and models for a perfect fit.

Australian vs. US/UK Sizing

Blundstone originates from Australia, and their sizing historically follows Australian standards. However, recognizing a global market, they also offer sizing conversions for US and UK customers. It’s crucial to understand these differences to avoid ordering the incorrect size.

Generally, Australian sizing tends to run about half to one full size larger than US sizing. For example, an Australian size 9 might equate to a US men’s size 8.5 or 9, depending on the specific model and foot width. UK sizing is often similar to US sizing, but slight variations can occur.

Important Note: These are general guidelines. Blundstone recommends always referring to their official size chart, available on their website and at authorized retailers, as discrepancies can exist. It’s also wise to consider that some models may fit differently than others, even within the same sizing system. Always prioritize measuring your feet accurately before making a purchase to ensure the best possible fit.

Men’s Blundstone Size Guide

Finding the perfect fit for men’s Blundstone boots begins with accurate foot measurement. Blundstone offers a range of sizes, typically starting around US men’s size 7 and extending to size 16, though availability may vary by model. Widths are also a consideration, with standard and wide options available in select styles.

Men should measure both feet, as sizes can differ. Use a Brannock device at a shoe store for the most precise measurement, or trace your foot on paper and measure the length from heel to longest toe. Compare this measurement to Blundstone’s official size chart.

Remember to measure your feet while wearing the socks you intend to wear with your Blundstones. Consider ordering a half size up if you’re between sizes or prefer a more relaxed fit. Blundstones often mold to the foot over time, but starting with the correct size is essential for initial comfort.

How to Measure Your Foot for Blundstones (Men)

Accurate measurement is crucial for Blundstone fit. Begin by placing a piece of paper larger than your foot flat on the floor, ideally against a wall. Wearing the socks you’d typically wear with Blundstones, firmly place your foot on the paper, ensuring your heel touches the wall.

Trace around your entire foot carefully with a pen or pencil. Repeat with the other foot, as sizes can vary. Remove your foot and, using a ruler or measuring tape, measure the length from the back of the heel tracing to the tip of your longest toe. Measure both feet and use the larger measurement.

Convert this length measurement to US sizing using a Blundstone size chart (available on their website or at authorized retailers). Note the width as well. If your measurement falls between sizes, consider going up half a size for a comfortable fit, as Blundstones can mold to your foot over time.

Women’s Blundstone Size Guide

Finding the perfect fit in Blundstones for women requires understanding their sizing nuances. Women’s Blundstone sizing generally corresponds to standard US women’s sizes, but variations exist between models. It’s essential to consult the official Blundstone size chart, as it provides the most accurate conversions from foot length to Blundstone size.

Women often find they need to consider width, as Blundstones aren’t always offered in multiple widths. If you typically fall between sizes, it’s generally recommended to size up, especially if you plan to wear thicker socks. Blundstones are designed to break in and mold to your foot, but starting with a slightly larger size prevents initial discomfort.

Remember to measure both feet, as discrepancies are common, and always use the larger measurement as your guide. Prioritize comfort and allow room for natural foot movement.

How to Measure Your Foot for Blundstones (Women)

Accurate foot measurement is crucial for Blundstone sizing. Begin by placing a piece of paper larger than your foot flat on the floor, ideally against a wall. Wearing the socks you intend to wear with your Blundstones, stand with your heel against the wall.

Trace your foot carefully, ensuring the pen or pencil is held vertically. Repeat with the other foot, as sizes can differ. Measure the length from the heel to the tip of your longest toe in both feet, in millimeters or inches. Use the larger measurement for sizing;

Consult the official Blundstone women’s size chart, matching your foot length to the corresponding Blundstone size. Consider measuring your foot width at the widest point for a more precise fit assessment. This will help determine if a standard width will suffice or if you need to account for potential tightness;

Specific Blundstone Models & Fit

Blundstone offers diverse models; the Classic 500 series is popular. Fit can vary slightly between Chelsea boot variations and work boot styles, impacting sizing choices.

Classic 500 Series Sizing

Blundstone’s iconic 500 series is renowned for its comfort and durability, but achieving the perfect fit requires attention to detail. Many find this series runs true to size for most feet, however, factors like sock thickness and individual foot shape play a crucial role. It’s often recommended to measure your feet accurately, as relying on your usual shoe size can be misleading.

Consider that the 500 series features a relatively streamlined fit. Individuals with wider feet might find it beneficial to either size up half a size or explore models specifically designed for wider foot profiles. Conversely, those with narrower feet may not require any adjustments. The elastic side panels offer some give, but significant discrepancies in width can lead to discomfort.

Furthermore, the 500 series is available in both Australian and UK/US sizing, so double-checking the conversion chart is essential before making a purchase. Online retailers typically provide detailed size guides, and consulting customer reviews can offer valuable insights into how different sizes fit in practice. Prioritizing accurate measurement and understanding these nuances will ensure a comfortable and long-lasting experience with your Blundstone 500s.

Chelsea Boot Variations ⎯ Fit Differences

Blundstone offers various Chelsea boot styles beyond the classic 500 series, each with subtle fit variations. The 550 series, for example, boasts a more refined and slimmer profile compared to the 500, potentially requiring a half-size increase for those with wider feet or preferring a looser fit. Similarly, the 585 series, designed for rugged terrain, often incorporates a more substantial toe box, offering increased roominess.

Leather thickness also influences fit. Models utilizing thicker leather may initially feel snugger but will stretch and mold to the foot over time. Conversely, boots with softer leather may offer immediate comfort but could lose shape more readily. It’s crucial to consider the intended use of the boots when assessing fit – work boots may benefit from a slightly more secure fit, while casual Chelsea boots can prioritize comfort.

Always consult the specific size guide provided by the retailer for the particular Blundstone model you’re considering. Customer reviews often highlight any discrepancies or fit quirks, providing valuable real-world feedback. Remember that individual foot shapes vary, and a professional fitting can ensure optimal comfort and performance;

Blundstone Work Boot Sizing Considerations

Blundstone work boots, designed for demanding environments, require a particularly precise fit to ensure safety and comfort during long workdays. Unlike casual styles, work boots often benefit from a snugger fit to prevent slippage within the boot, reducing the risk of blisters and foot fatigue. Consider wearing the type of work socks you typically use when measuring your feet for work boots.

Steel-toe or composite-toe models necessitate additional toe room to accommodate the safety features without compromising comfort. A half-size increase is often recommended for these styles. Furthermore, the addition of orthotic inserts, common in work boots for enhanced support, should be factored into the sizing process. Ensure sufficient space remains after inserting the orthotics.

Pay close attention to width, as work boots often feature a narrower profile for a secure fit. If you typically require wide-width shoes, explore Blundstone’s wide-fit options or consider a half-size increase to accommodate wider feet. Prioritize a fit that allows for natural foot movement without excessive looseness.

Common Blundstone Sizing Issues & Solutions

Blundstone sizing can be tricky; common issues include width problems or boots feeling too large/small. Solutions involve sock adjustments, insoles, or exchanging for a different size.

Dealing with Width Issues

Blundstone boots, while renowned for their comfort, can sometimes present width challenges for certain foot shapes. A frequent concern is that the standard width feels too narrow, particularly across the ball of the foot. If you experience this, consider trying a half size up, as this can sometimes provide a slightly wider fit. However, this isn’t always a guaranteed solution.

For those with genuinely wider feet, exploring aftermarket insoles designed to add volume can be incredibly beneficial. These insoles can effectively redistribute pressure and create a more accommodating fit. Additionally, Blundstone does offer some models with wider fitting options, so researching those specifically designed for wider feet is worthwhile.

Conversely, if your boots feel too wide, thicker socks can help take up some of the excess space. Lacing adjustments, if applicable to the model, can also provide a snugger fit. Remember that Blundstone leather will naturally mold to your foot over time, potentially resolving minor width issues as the boots break in.

What to Do If Your Blundstones Are Too Big/Small

Discovering your Blundstone boots don’t fit perfectly is common, but thankfully, solutions exist. If they’re too small, attempting a break-in period with thicker socks is a first step. However, consistently tight boots risk discomfort and blisters, so exchanging them for the correct size is often the best course of action. Many retailers offer exchange policies, especially if the boots are unworn.

If your boots are too large, thicker socks are the initial remedy. Consider adding an insole – a full or ¾ length insole can significantly reduce volume and improve the fit. Heel grips can also help prevent slippage. If these measures prove insufficient, exchanging for a smaller size is recommended.

Remember that Blundstone leather will stretch slightly with wear, but significant size adjustments aren’t guaranteed. Prioritizing accurate initial sizing, using a proper measuring guide, and understanding the return policies of your retailer are crucial for a comfortable experience.

Where to Buy & Get Fitted

Blundstone boots are available at authorized retailers and online stores like OZON and Avito. Professional fitting ensures optimal sizing, enhancing comfort and boot longevity.

Authorized Retailers & Online Stores

Finding the right retailer is crucial for a proper Blundstone fitting experience. Authorized retailers boast knowledgeable staff trained to assist with sizing and offer a wider selection of styles. These stores often have Brannock devices available for accurate foot measurements, a key step in determining your ideal Blundstone size.

Online purchasing offers convenience, but requires careful consideration. Websites like OZON provide a broad range of Blundstone models, often with customer reviews that can offer sizing insights. Avito, a marketplace, features both new and used options, but sizing verification is essential before purchase. Always consult the official Blundstone size guide alongside retailer-specific information.

Directly from Blundstone is also an option, ensuring authenticity and access to the latest collections. Remember to check return policies when buying online, allowing for exchanges if the initial size isn’t perfect. Prioritize retailers with generous return windows and clear sizing charts to minimize potential issues.

manual shifter assembly

Manual shifter assemblies are crucial components‚ enabling drivers to select gears and control vehicle speed with precision and a direct connection.

What is a Manual Shifter Assembly?

A manual shifter assembly is the system within a vehicle that allows the driver to manually select different gears in the transmission. It’s more than just the gear stick itself; it’s a carefully engineered collection of parts working in harmony.

Essentially‚ it translates the driver’s hand movements into mechanical actions within the transmission. This assembly typically includes the shift knob‚ the shift boot‚ the linkage (either cables or direct rods)‚ the shift fork‚ and selector rods. These components work together to move the synchronizers‚ ultimately engaging the desired gear.

Unlike automatic transmissions‚ a manual system requires the driver to actively participate in the gear selection process‚ providing a more engaging and connected driving experience. The quality and precision of the shifter assembly significantly impact the feel and smoothness of gear changes.

Historical Overview of Manual Transmissions

The roots of manual transmissions trace back to the late 19th century‚ coinciding with the invention of the automobile itself. Early vehicles relied on complex lever systems‚ a far cry from modern shifter assemblies. These initial designs were often clunky and required significant driver effort.

Over the decades‚ advancements focused on improving ease of use and efficiency. The introduction of synchromesh technology in the 1920s was a pivotal moment‚ dramatically reducing gear clash and smoothing shifts. Post-World War II saw widespread adoption of fully synchronized manual transmissions.

Throughout the mid-20th century‚ manual transmissions were dominant. However‚ the rise of automatic transmissions began in the 1950s‚ offering convenience. Despite this‚ manuals remained popular for their driver engagement and fuel efficiency‚ evolving into the refined systems we know today.

Components of a Manual Shifter Assembly

Manual shifter assemblies comprise several key parts: the shift knob‚ linkage‚ shift forks‚ synchronizers‚ and related hardware‚ working in harmony.

The Shift Knob & Boot

The shift knob is the driver’s direct interface with the manual transmission‚ available in diverse materials like metal‚ plastic‚ or wood‚ influencing feel and aesthetics.

Beyond aesthetics‚ knob weight impacts shifting effort; heavier knobs can offer a more substantial feel‚ while lighter ones provide quicker movements. The shift boot‚ typically made of leather or synthetic materials‚ surrounds the shifter base.

Its primary function is to prevent debris‚ dust‚ and unwanted elements from entering the transmission. A worn or damaged boot can lead to a gritty shifting experience and potential internal damage. The boot also contributes to cabin sound insulation‚ reducing noise from the transmission. Proper fit and secure attachment are vital for optimal performance and longevity.

Shift Linkage – Cables vs. Direct Linkage

Shift linkage transmits the driver’s movements from the shifter to the transmission. Two primary types exist: cable-operated and direct linkage.

Cable systems utilize steel cables housed within protective sheaths‚ offering flexibility in shifter placement and simplifying installation‚ particularly in front-wheel-drive vehicles. However‚ they can exhibit some inherent play‚ potentially leading to a less precise feel.

Direct linkage‚ employing solid rods and levers‚ provides a more direct and responsive connection. This results in a crisper‚ more accurate shifting experience favored by performance enthusiasts. Direct linkage requires precise alignment and is typically found in rear-wheel-drive applications. Maintenance involves checking for wear and ensuring proper lubrication to maintain optimal performance and prevent binding.

The Shift Fork & Selector Rods

Shift forks and selector rods are integral to the internal gear selection process within the transmission. Selector rods‚ connected to the shift linkage‚ move in response to driver input.

These rods engage with the shift forks‚ which are y-shaped levers. The forks then slide the synchronizer sleeves along the main shaft or countershaft‚ enabling gear engagement. Precise movement and alignment are critical; any binding or wear can cause difficulty shifting or damage to the transmission.

Shift forks are typically made of hardened steel to withstand substantial forces. Regular inspection for wear‚ bending‚ or damage is essential during transmission service. Proper lubrication minimizes friction and ensures smooth‚ reliable gear changes.

Synchronizers: Ensuring Smooth Gear Changes

Synchronizers are vital components within a manual transmission‚ responsible for matching the speeds of the gears before engagement. Without them‚ shifting would result in harsh grinding and potential damage.

They utilize friction cones and a blocking ring to equalize rotational speeds. As the shift fork moves the synchronizer sleeve‚ the cone contacts the gear‚ creating friction. This friction brings the gear up to speed with the main shaft before the teeth fully engage.

Worn synchronizers cause grinding‚ especially when shifting quickly. They consist of several parts prone to wear‚ including the cone‚ blocking ring‚ and sleeve. Proper lubrication is crucial for their function and longevity‚ ensuring seamless and quiet gear transitions.

How a Manual Shifter Assembly Works

The assembly translates driver input into gear selection‚ utilizing linkage and internal mechanisms to smoothly disengage and engage gears for optimal power transfer.

Driver Input & Linkage Activation

The process begins with the driver intentionally moving the shift knob‚ initiating the entire gear-changing sequence. This seemingly simple action applies force to the shift linkage – a system of rods or cables – directly connected to the transmission.

The linkage’s design dictates how accurately and efficiently this force is transmitted. Cables offer flexibility in routing‚ while direct linkages provide a more precise‚ connected feel. As the driver moves the shifter‚ the linkage correspondingly pushes or pulls‚ activating the appropriate selector rod within the transmission.

This initial movement is critical; it’s the first step in disengaging the current gear and preparing for the selection of a new one‚ all stemming from the driver’s deliberate input.

Selecting the Gear – Internal Mechanism

Within the transmission‚ the selector rod‚ activated by the linkage‚ engages with the shift fork. This fork then slides a synchronizer sleeve along the gear shaft. The synchronizer’s crucial role is to match the rotational speed of the selected gear to the output shaft‚ preventing grinding.

Once speeds are synchronized‚ the sleeve locks the selected gear to the shaft‚ effectively transferring power through that gear ratio. Different gear ratios provide varying levels of torque and speed.

This internal dance‚ orchestrated by the driver’s initial input‚ is a precise mechanical process‚ ensuring smooth and efficient power delivery. The entire system relies on accurate engagement and synchronization for optimal performance.

Disengaging & Engaging Gears

Disengaging a gear involves the shift fork moving the synchronizer sleeve away from the currently engaged gear. This breaks the lock between the gear and the output shaft‚ momentarily interrupting power transfer. Simultaneously‚ the driver prepares to select the next gear ratio.

Engaging a gear is the reverse process. The shift fork moves the synchronizer sleeve towards the desired gear‚ initiating the synchronization process. Once synchronized‚ the sleeve locks the gear to the shaft‚ re-establishing power flow through the new gear ratio.

This continuous cycle of disengagement and engagement‚ facilitated by the manual shifter assembly‚ allows the driver to adapt to changing driving conditions and maintain optimal engine performance.

The Role of the Clutch

The clutch is fundamentally linked to the manual shifter assembly‚ acting as a temporary disconnector between the engine and the transmission. When the clutch pedal is depressed‚ it disengages the engine’s power from the transmission’s input shaft‚ allowing for smooth gear changes.

Without clutch disengagement‚ attempting to shift gears would result in significant grinding and potential damage to the transmission components. The clutch enables the synchronizers within the shifter assembly to function effectively‚ matching the speeds of the gears.

Releasing the clutch pedal gradually re-engages the engine‚ smoothly transferring power through the newly selected gear ratio.

Common Issues with Manual Shifter Assemblies

Shifter assemblies can develop problems like difficult gear engagement‚ grinding noises‚ looseness‚ or linkage failures‚ impacting driving experience and requiring attention.

Difficulty Shifting Gears

Experiencing resistance when attempting to change gears is a frequent complaint with manual transmissions. This can manifest as a general stiffness across all gears‚ or be isolated to specific gears‚ like second or third. Several factors contribute to this issue. Worn synchronizers‚ responsible for matching gear speeds‚ are a primary culprit‚ causing a clash and making engagement difficult.

Low or contaminated transmission fluid can also increase friction within the gearbox‚ hindering smooth shifting. A stretched or damaged shift linkage – whether cable or direct – prevents the shifter from fully engaging the selector forks. Internal wear within the transmission itself‚ such as worn dogs on the gears‚ can also contribute. Finally‚ a failing clutch‚ not fully disengaging‚ can make shifting problematic‚ as the gears remain partially engaged.

Grinding Noises During Shifts

A distinct grinding sound when changing gears is a clear indication of a synchronization problem within the manual transmission. This occurs when the gears aren’t rotating at matching speeds before the shift forks attempt engagement. Severely worn synchronizer rings are the most common cause‚ failing to properly ‘mesh’ the gears.

However‚ grinding can also stem from rushing shifts – not fully depressing the clutch pedal or attempting to change gears before the engine RPMs have dropped sufficiently. Low transmission fluid levels can exacerbate the issue‚ reducing lubrication and increasing friction. In more serious cases‚ damaged gear teeth or a failing clutch release bearing can produce grinding noises. Ignoring these sounds can lead to significant and costly transmission damage‚ so prompt diagnosis is crucial.

Loose or Sloppy Shifter Feel

A vague or imprecise shifter feel‚ often described as “sloppy‚” indicates excessive play within the manual shifter assembly. This commonly arises from worn bushings in the shift linkage – the components connecting the shifter to the transmission. These bushings‚ typically made of rubber or polyurethane‚ deteriorate over time‚ creating unwanted movement.

Worn or damaged shift linkage cables can also contribute to this issue‚ stretching and losing their ability to transmit input accurately. Internal transmission wear‚ specifically within the selector rods or shift forks‚ can also manifest as a loose feel. While not immediately catastrophic‚ a sloppy shifter detracts from the driving experience and can eventually lead to missed shifts or difficulty selecting gears. Addressing this improves control and prevents further wear.

Shifter Linkage Problems & Adjustments

Shifter linkage issues frequently involve imprecise gear selection or difficulty engaging certain gears. Cable-based systems can stretch over time‚ requiring adjustment to restore proper tension. Direct linkage systems may develop play at connection points‚ necessitating tightening or bushing replacement.

Adjustment procedures vary by vehicle‚ but generally involve loosening locknuts and repositioning linkage rods to align the shifter with the transmission’s selector rail. Proper alignment is crucial; incorrect adjustment can worsen the problem or even damage internal components. Regularly inspecting linkage for wear and ensuring secure connections is vital preventative maintenance. When adjustments fail to resolve the issue‚ a thorough inspection for damaged components is necessary.

Maintenance & Repair of Manual Shifter Assemblies

Regular upkeep and timely repairs are essential for maintaining optimal performance and extending the lifespan of your manual shifter assembly.

Regular Inspection & Lubrication

Consistent inspection of the manual shifter assembly is paramount for identifying potential issues before they escalate. Begin by visually checking all linkage components – cables or rods – for wear‚ damage‚ or corrosion. Pay close attention to mounting points and bushings‚ ensuring they are secure and intact.

Next‚ examine the shift knob and boot for any signs of deterioration. Lubrication is equally vital; apply a suitable grease to all moving parts‚ including pivot points‚ cable ends‚ and the shift fork contact surfaces. This reduces friction‚ ensures smooth operation‚ and prevents premature wear.

Periodically‚ inspect the shift linkage for play or looseness. A slight amount of movement is normal‚ but excessive play indicates potential problems. Remember to consult your vehicle’s service manual for specific lubrication recommendations and intervals.

Adjusting Shifter Linkage

Proper shifter linkage adjustment is crucial for precise gear selection. Begin by loosening the adjustment points – typically found at the transmission end of the cables or on direct linkage rods. With the transmission in neutral‚ carefully align the shifter to its designated neutral position.

Next‚ systematically check each gear‚ ensuring it engages fully and without resistance. Adjust the linkage incrementally until smooth‚ accurate shifts are achieved across all gears. Tighten the adjustment points securely once optimal alignment is confirmed.

If using cables‚ ensure proper cable tension; too loose and shifting will be sloppy‚ too tight and it can bind. Always refer to your vehicle’s repair manual for specific adjustment procedures and torque specifications to avoid damage.

Replacing Worn Components

Worn components within the manual shifter assembly often cause shifting issues. Common replacements include shift bushings‚ which eliminate slop and improve feel. Inspect and replace worn shift linkage cables or rods‚ ensuring smooth movement. A damaged shift knob or boot should also be replaced for comfort and aesthetics.

When replacing parts‚ disconnect the battery for safety. Carefully document the original component arrangement before disassembly. Use appropriate tools to avoid damage during removal and installation. Always lubricate new bushings and pivot points with a suitable grease.

After replacement‚ thoroughly test the shifter through all gears to confirm proper operation and eliminate any remaining issues. Refer to your vehicle’s service manual for specific part numbers and procedures.

Troubleshooting Common Problems

Difficulty shifting often points to linkage issues‚ low transmission fluid‚ or a failing clutch. Grinding noises during shifts usually indicate synchronizer problems or improper clutch engagement. A loose shifter feel suggests worn bushings or excessive play in the linkage.

Start by inspecting the shift linkage for looseness or damage. Check transmission fluid levels and condition. If the clutch feels spongy‚ bleed the hydraulic system or inspect the cable. Listen carefully to pinpoint the source of grinding noises.

Systematically eliminate potential causes‚ testing after each adjustment or repair. Consult a repair manual for specific diagnostic procedures and torque specifications. Don’t hesitate to seek professional help if the problem persists.

Advanced Concepts & Modifications

Performance enthusiasts often explore short throw shifters‚ weighted knobs‚ and complete aftermarket assemblies for enhanced control and a more engaging driving experience.

Short Throw Shifters – Performance Enhancement

Short throw shifters dramatically reduce the distance the gear lever travels between gears‚ resulting in quicker‚ more direct shifts. This modification appeals to drivers seeking a sportier feel and improved lap times. By minimizing the throw‚ less time is spent transitioning between gears‚ allowing for faster acceleration and more responsive control.

These shifters achieve this reduction through altered linkage geometry or internal mechanisms within the transmission. Installation varies depending on the vehicle and shifter design‚ ranging from relatively simple cable-based adjustments to more complex internal component replacements. While enhancing performance‚ it’s important to note that short throw shifters can sometimes require a greater degree of force to engage gears‚ and may not be ideal for daily driving if comfort is a primary concern.

Weighted Shift Knobs – Improving Feel

Weighted shift knobs are a popular modification aimed at enhancing the driving experience by altering the tactile feedback during gear changes. Adding weight to the shift knob increases its momentum‚ creating a more substantial and connected feel. This can lead to smoother‚ more deliberate shifts‚ as the knob resists unwanted movement and provides a more satisfying mechanical interaction.

The weight is typically achieved using materials like brass‚ stainless steel‚ or aluminum. Different weights are available‚ allowing drivers to customize the feel to their preference. Heavier knobs generally offer greater stability but may require slightly more effort to move. Beyond feel‚ weighted knobs can also subtly reduce vibrations transmitted to the driver’s hand. They are a relatively inexpensive and easy-to-install upgrade for any manual transmission vehicle.

Aftermarket Shifter Assemblies – Options & Benefits

Aftermarket shifter assemblies offer a significant upgrade path for enthusiasts seeking improved performance and customization beyond factory offerings. These assemblies often feature enhanced internal components‚ tighter tolerances‚ and adjustable settings for shift throw and feel. Options range from complete replacement units to individual components like shift bases and linkages.

Benefits include reduced shifter travel‚ crisper and more precise shifts‚ and elimination of slop or looseness. Many aftermarket shifters allow for customization of shift patterns‚ catering to individual driving styles. Materials used are typically higher grade than OEM‚ increasing durability. Installation can vary in complexity‚ but the resulting improvement in driving engagement and control is often substantial‚ transforming the feel of a manual transmission vehicle.

makkar ielts speaking pdf 2024

Makkar IELTS Speaking PDF 2024: A Comprehensive Guide

The Makkar IELTS Speaking PDF is a widely used resource for test preparation, offering cue cards, sample answers, and predicted questions.
It’s frequently updated, with versions covering January to December 2026 currently available for free download.

What is the Makkar IELTS Speaking PDF?

The Makkar IELTS Speaking PDF is a compilation of predicted questions and model answers designed to assist candidates preparing for the Speaking section of the International English Language Testing System (IELTS) exam. Created by Kiran Makkar, this resource has gained significant popularity, particularly amongst test-takers in India, due to its perceived accuracy in forecasting actual exam questions.

However, it’s crucial to remember that the PDF is a prediction, not a guarantee of exact questions. Its value lies in providing extensive practice material and familiarizing candidates with common IELTS Speaking topics.

The History and Evolution of Makkar Materials (2022-2026)

Kiran Makkar’s materials initially gained traction around 2022, quickly becoming a staple for IELTS preparation, particularly in India. Early versions focused on compiling frequently asked questions and providing model answers, establishing a foundation for future iterations. The core concept revolved around identifying patterns in examiner questioning.

From 2023 onwards, the materials evolved to include “guesswork” PDFs, attempting to predict upcoming cue cards and topics for specific exam periods. These predictions are released in segments – for example, January to April, May to August, and September to December – reflecting the IELTS testing cycle. The 2025 and 2026 versions demonstrate a continued refinement of this predictive approach.

The availability of these materials has expanded beyond physical books to include freely downloadable PDFs, increasing accessibility. Resources like IELTS Worldly actively share these updates. While the initial focus was on the Indian IELTS market, the materials’ popularity has spread internationally, prompting discussion about their relevance in other testing locations, like Canada.

Why is the Makkar PDF Popular Among IELTS Candidates?

The Makkar IELTS Speaking PDF’s popularity stems from its perceived ability to predict actual exam questions, particularly cue cards. Many candidates, especially those preparing in India, report a high degree of overlap between the PDF’s content and questions asked during their tests. This perceived accuracy builds confidence and allows focused preparation.

Furthermore, the PDF provides a substantial collection of sample answers, offering candidates a starting point for structuring their own responses. While direct memorization is discouraged, these samples demonstrate appropriate vocabulary, grammar, and fluency levels. The categorized topics and themes also aid in systematic study.

The readily available, free access to the PDF is a significant factor. Online platforms and communities, like Reddit’s r/IELTS, actively discuss and share the latest versions. Candidates aiming for high band scores, such as 7 or 7.5, often utilize Makkar materials as part of their intensive preparation strategy, hoping to maximize their chances of success.

Content Breakdown of the Makkar Speaking PDF

The Makkar PDF comprehensively covers all three parts of the IELTS Speaking test. It includes Part 1 questions, categorized Part 2 cue cards, and relevant Part 3 follow-up questions with model answers.

Part 1: Common Questions and Sample Answers

The Makkar IELTS Speaking PDF dedicates a significant section to Part 1, featuring frequently asked questions on familiar topics like home, family, work, and hobbies. These questions are designed to assess your basic conversational skills and fluency.

The PDF doesn’t just provide the questions; it also offers detailed sample answers. These aren’t meant for rote memorization, but rather to illustrate the expected length, vocabulary, and grammatical range. Candidates can analyze these responses to understand how to structure their own answers effectively.

The sample answers often include idiomatic expressions and nuanced language, helping candidates elevate their speaking performance. Furthermore, the PDF often categorizes questions by theme, allowing focused practice. For example, all questions related to ‘technology’ might be grouped together. This targeted approach allows candidates to build confidence and expand their vocabulary within specific areas. The goal is to move beyond simple answers and demonstrate a natural command of the English language.

Part 2: Cue Card Topics – Categorization and Themes

The Makkar IELTS Speaking PDF excels in its comprehensive collection of Cue Card topics, a crucial component of the Speaking test. These topics are meticulously categorized into themes like ‘People,’ ‘Places,’ ‘Events,’ ‘Objects,’ and ‘Experiences,’ facilitating focused preparation. This organization allows candidates to efficiently target areas where they feel less confident.

The PDF’s strength lies in predicting upcoming cue cards. Recent versions, like those for January-April and May-August 2026, offer a substantial list of potential prompts. Each cue card includes prompts and sub-points to guide the two-minute talk.

Beyond simply listing topics, the PDF often indicates the frequency with which certain themes appear in past exams. This data-driven approach helps candidates prioritize their study efforts. The categorization also aids in brainstorming ideas and developing relevant vocabulary. Candidates can practice structuring a two-minute response for each cue card, improving fluency and coherence.

Part 3: Follow-up Questions – Expanding on Cue Card Responses

The Makkar IELTS Speaking PDF doesn’t just provide cue cards; it anticipates the subsequent Part 3 discussion, offering a range of follow-up questions designed to assess deeper analytical and critical thinking skills. These questions directly relate to the themes explored in the cue card, prompting candidates to elaborate on their initial responses.

The PDF’s inclusion of these follow-up questions is invaluable for practice. It allows candidates to move beyond memorized answers and develop the ability to think on their feet; Questions often explore abstract concepts, societal implications, or personal opinions related to the cue card topic.

By studying the sample answers provided alongside the follow-up questions, candidates can learn how to structure complex responses, use appropriate linking phrases, and demonstrate a wider range of vocabulary. This section helps bridge the gap between delivering a coherent two-minute talk and engaging in a natural, extended conversation with the examiner.

Relevance to IELTS Speaking Exam in Canada

The Makkar PDF’s usefulness in Canada is debated; while popular in India for predicting cue cards, Canadian examiners may utilize a broader range of questions;

Accuracy of Predictions for Canadian IELTS Exams

Determining the predictive accuracy of the Makkar IELTS Speaking PDF for Canadian exams requires nuanced understanding. While extensively utilized in India, where a trend of examiners drawing heavily from the latest Makkar materials exists, the Canadian context differs. Online discussions, such as those on r/IELTS on Reddit, highlight candidate concerns regarding its applicability for Permanent Residency (PR) purposes requiring high band scores like 7778.

The core issue lies in examiner autonomy; Canadian IELTS examiners aren’t necessarily bound by the same predictive patterns as their Indian counterparts. They possess the freedom to formulate questions beyond the Makkar PDF’s content, assessing genuine communicative ability. However, the PDF still provides valuable practice material, exposing candidates to common themes and question structures.

Recent updates, including the January to April 2026 cue cards, offer a glimpse into potential topics. But relying solely on these predictions is risky. A strategic approach involves using the PDF as a supplementary resource, alongside diverse practice methods, to build fluency and adaptability – crucial for success in the Canadian IELTS Speaking test.

Comparison of Examiner Question Styles: India vs. Canada

Significant differences exist between examiner question styles in India and Canada for the IELTS Speaking test. In India, a noticeable pattern emerges where examiners frequently utilize cue cards directly from the latest Makkar IELTS Speaking PDF, particularly for Part 2. This predictability allows candidates preparing with the PDF to anticipate potential topics and formulate rehearsed responses.

Conversely, Canadian examiners generally exhibit greater flexibility and a preference for assessing spontaneous communication. While they may cover similar themes found in the Makkar PDF, they are less likely to directly replicate cue cards. Instead, they focus on probing deeper with follow-up questions (Part 3), evaluating a candidate’s ability to elaborate and express ideas naturally.

This divergence necessitates a shift in preparation strategy. While the Makkar PDF remains useful for familiarizing oneself with common topics, Canadian test-takers should prioritize developing fluency, expanding vocabulary, and practicing thinking on their feet. Over-reliance on memorized answers, a common tactic in India, can be detrimental in Canada, potentially sounding robotic and hindering genuine communication.

The Role of Cue Cards in the Canadian IELTS Speaking Test

Cue cards form a crucial component of the Canadian IELTS Speaking test, specifically within Part 2. While the Makkar IELTS Speaking PDF provides a valuable resource for familiarizing candidates with potential topics, it’s vital to understand their function isn’t simply about reciting memorized responses. Canadian examiners use cue cards to assess a candidate’s ability to organize thoughts, speak coherently, and develop an idea over a sustained period – typically two minutes.

The emphasis lies on fluency and natural language use, rather than perfect grammar or complex vocabulary. Examiners are evaluating how effectively you can talk about a topic, not how well you’ve prepared a script. Although the Makkar PDF offers sample answers, these should serve as inspiration, not templates.

Candidates should focus on adapting the ideas presented in the PDF to their own experiences, ensuring their responses sound authentic and engaging. A strong performance involves expanding on the points suggested by the cue card, demonstrating a range of language, and maintaining eye contact – skills the PDF can help build, but not replace.

Using the Makkar PDF Effectively

Maximize your preparation by adapting sample answers to personal experiences, focusing on fluency, and avoiding robotic delivery. Practice consistently with the latest PDF versions for optimal results.

Strategies for Memorizing Sample Answers

While the Makkar PDF provides valuable sample answers, rote memorization isn’t the most effective strategy. Instead, focus on understanding the structure and vocabulary used; Break down complex sentences into smaller, manageable chunks. Utilize spaced repetition – review answers at increasing intervals to reinforce retention.

Don’t aim for word-for-word recall; prioritize grasping the core ideas and key phrases. Record yourself speaking the answers and identify areas needing improvement. Connect the sample responses to your own personal experiences, making them more memorable and natural. This allows for flexible adaptation during the actual exam.

Furthermore, create flashcards with keywords or prompts related to each cue card. Regularly test yourself, focusing on recalling the main points rather than the exact wording. Remember, the goal is to demonstrate fluency and coherence, not to recite a pre-prepared script. Effective memorization involves understanding, adaptation, and consistent practice.

Adapting Sample Answers to Your Own Experiences

The Makkar PDF’s sample answers serve as excellent starting points, but examiners value genuine communication. Directly copying responses can sound robotic and unnatural, hindering your score. Instead, personalize the content by weaving in your own anecdotes, opinions, and details.

Identify the core ideas within a sample answer and then brainstorm how those ideas relate to your life. Replace generic examples with specific, personal ones. For instance, if a sample answer discusses a favorite hobby, describe your favorite hobby and why you enjoy it.

Focus on modifying the language to reflect your natural speaking style. Don’t force complex vocabulary if it doesn’t feel comfortable. Practicing this adaptation builds confidence and ensures your responses are authentic and engaging. Remember, the IELTS speaking test assesses your ability to communicate effectively, not to replicate pre-written text;

Practicing Speaking Fluency with Makkar Materials

The Makkar IELTS Speaking PDF is most effective when used for active practice, not passive reading. Don’t just read the sample answers; speak them aloud, recording yourself to identify areas for improvement. Utilize the cue cards to simulate exam conditions, timing yourself for the two-minute response.

Expand beyond the provided answers by creating your own responses to the same cue cards. This encourages spontaneous thinking and reduces reliance on memorization. Practice with a language partner or tutor for valuable feedback on pronunciation, grammar, and fluency.

Regular, consistent practice is key. Even short, daily sessions are more beneficial than infrequent, lengthy ones. Focus on maintaining a natural pace and avoiding excessive pauses. The goal is to demonstrate your ability to communicate comfortably and effectively in English.

Latest Updates and Versions (January ⎻ December 2026)

Recent Makkar PDF releases cover January to April, May to August, and September to December 2026. These include cue cards with model answers for Parts 1, 2, and 3.

Makkar Speaking Guesswork: September to December 2026

The September to December 2026 Makkar Speaking Guesswork PDF represents a crucial resource for IELTS candidates preparing for their speaking tests during this period. This final version, available for download, aims to predict potential cue card topics and follow-up questions examiners might utilize. It’s built upon observed trends, particularly those noted in Indian IELTS testing centers, where a correlation between Makkar materials and actual exam questions has been frequently reported;

The PDF contains a comprehensive collection of cue cards, categorized by theme, alongside detailed sample answers designed to showcase a high level of fluency and coherence. Part 1 and Part 3 questions are also included, providing candidates with opportunities to practice expanding on their responses and demonstrating a wider range of vocabulary and grammatical structures.

While the accuracy of these predictions for Canadian IELTS exams is debated – as examiner styles can differ – many candidates find the material valuable for familiarizing themselves with common topics and developing effective speaking strategies. It’s a 257-page document, offering extensive practice material.

Makkar Speaking Guesswork: May to August 2025 & 2026

The Makkar Speaking Guesswork for May to August 2025 and 2026 provides candidates with a focused preparation tool for these specific exam windows. This resource, often released in “First Version” format, anticipates potential speaking test topics based on recent trends and examiner patterns. It’s designed to supplement broader IELTS preparation and offer targeted practice.

The PDF includes a substantial number of cue cards, covering a diverse range of themes, accompanied by model answers intended to demonstrate the level of response required for a high band score; Part 1 and Part 3 questions are also incorporated, allowing candidates to practice extending their answers and showcasing their linguistic range. The material aims to help students develop fluency and confidence.

Notably, the 2025 version delves into topics like Artificial Intelligence and Semantics, reflecting current global interests. While originating from observations in India, candidates globally utilize it, acknowledging potential variations in Canadian examiner approaches.

Accessing and Downloading the Latest PDF Versions

Obtaining the latest Makkar IELTS Speaking PDF typically involves searching online platforms and educational resource websites. Several websites offer free downloads of the various versions, including those covering January to April 2026, and the frequently updated guesswork editions for May-August and September-December. A direct link, https://bit.ly/IELTS-Makkar, has been circulated for the 2022 materials.

However, users should exercise caution when downloading from unofficial sources to avoid malware or outdated versions. Reputable IELTS preparation forums, like those on Reddit (r/IELTS), often share links and discuss the authenticity of available PDFs.

It’s crucial to verify the publication date to ensure you have the most current material. The “final version” for January-April 2026 is readily available, but remember to check for subsequent updates released throughout the year. Regularly monitoring these sources will provide access to the newest Makkar Speaking PDFs.

Limitations and Potential Drawbacks

Over-reliance on memorized answers can hinder genuine communication. The Makkar PDF may encourage robotic responses, impacting fluency and natural expression in the IELTS Speaking test.

Over-Reliance on Memorized Answers

A significant drawback of utilizing the Makkar IELTS Speaking PDF lies in the potential for candidates to become overly dependent on memorized responses. While the PDF provides valuable sample answers, treating them as scripts to be recited verbatim can be detrimental to performance. The IELTS Speaking test assesses a candidate’s ability to communicate spontaneously and effectively, not simply to recall pre-prepared material.

Examiners are trained to identify memorized responses, often through a lack of natural intonation, pauses, or eye contact. A response that sounds robotic or overly polished can negatively impact the examiner’s assessment of fluency and coherence. Furthermore, relying solely on memorization limits a candidate’s ability to adapt to unexpected questions or variations in the cue card topic.

Genuine communication requires the ability to think on one’s feet and express ideas in a natural and authentic manner. The Makkar PDF should be used as a tool for inspiration and understanding the expected level of response, not as a crutch for memorization. Candidates should focus on internalizing key vocabulary and grammatical structures, rather than attempting to replicate entire answers.

The Risk of Sounding Robotic or Unnatural

A primary concern when heavily utilizing the Makkar IELTS Speaking PDF is the heightened risk of delivering responses that sound artificial and unnatural. The provided sample answers, while structurally sound, can easily become templates if adopted without personalization. Examiners are adept at recognizing rote learning, and a lack of spontaneity significantly detracts from a candidate’s overall score.

Natural speech is characterized by hesitations, self-corrections, and a conversational tone – elements often absent in meticulously memorized answers. Attempting to perfectly replicate the PDF’s phrasing can lead to stilted delivery and a noticeable disconnect between the speaker and their words. This perceived lack of authenticity diminishes the impression of genuine communicative competence.

The IELTS Speaking test prioritizes fluency and coherence, which are best demonstrated through organic expression. Candidates should leverage the PDF to understand expected answer structures and vocabulary, but then adapt this knowledge to their own experiences and speaking style. Prioritizing naturalness over perfection is crucial for achieving a higher band score.

Importance of Genuine Communication Skills

While the Makkar IELTS Speaking PDF serves as a valuable preparation tool, it’s crucial to remember that it’s a supplement, not a substitute, for developing genuine communication skills. The IELTS Speaking test assesses a candidate’s ability to effectively convey information, express opinions, and engage in a natural conversation – skills that extend far beyond memorized responses.

Focusing solely on replicating sample answers can hinder the development of these core competencies. Examiners evaluate a range of factors, including pronunciation, grammar, vocabulary, and fluency, but also assess the candidate’s ability to think on their feet and respond appropriately to unexpected questions.

True proficiency in English communication involves adapting to different contexts, using language creatively, and maintaining a coherent line of thought. The PDF should be used to broaden vocabulary and understand typical question formats, but candidates must prioritize practicing speaking freely and developing their own unique voice. Ultimately, authentic communication is the key to success.

honda civic 2016 owners manual

Understanding your 2016 Honda Civic begins with its owner’s manual, offering crucial details for safe operation and maintenance․ Access official versions from Honda’s website or CivicX․

Digital copies are readily available, including US and international editions, with the US version being the most relevant for owners within the country․

Importance of the Owner’s Manual

The 2016 Honda Civic owner’s manual is an indispensable resource, providing vital information for maximizing your driving experience and ensuring vehicle longevity․ It details everything from basic operation – starting, steering, and braking – to complex systems like airbags and Vehicle Stability Assist (VSA)․

Understanding the manual safeguards against potential damage to your vehicle and promotes safe driving habits․ It clarifies warning lights, explains maintenance schedules, and outlines procedures for emergencies like flat tires or jump-starting․ Ignoring the manual can lead to improper vehicle use, costly repairs, and even safety hazards․

Familiarizing yourself with the manual empowers you to confidently operate and maintain your Civic, fostering a rewarding ownership experience․

Where to Find the Official Manual (Honda Website & CivicX)

Locating your 2016 Honda Civic’s official owner’s manual is straightforward․ Honda provides downloadable PDF versions on their official website: owners․honda․com/vehicles․ You can find manuals specific to the 2016 Civic Sedan and Coupe there, typically around 33-34MB in size and containing 587-595 pages․

Alternatively, CivicX (www․civicx․com) also hosts a downloadable PDF․ Be mindful of version differences; ensure you’re accessing the US edition for accurate information․ While other sources exist, prioritizing Honda’s website or CivicX guarantees you receive the correct and most up-to-date manual for your vehicle․

Understanding Manual Versions (US vs․ International)

It’s crucial to recognize that 2016 Honda Civic owner’s manuals come in different versions, primarily US and international․ These variations stem from differing regulations, features, and specifications across global markets․ Downloading an international manual, like the one referenced as a 17 CIVIC 5D (KE KG) PDF, will likely contain information irrelevant or inaccurate for a US-market Civic․

US manuals detail features specific to North American models, ensuring correct guidance on safety systems and operation․ Always prioritize obtaining the manual specifically designated for the United States to avoid confusion and ensure proper vehicle understanding․

Vehicle Identification & Key Information

Locate your 2016 Civic’s Vehicle Identification Number (VIN), and familiarize yourself with the vehicle labels and symbols for crucial identification details․

Vehicle Identification Number (VIN) Location

The 2016 Honda Civic’s unique Vehicle Identification Number (VIN) is essential for identification and warranty purposes․ You can find this 17-character code in several locations on your vehicle․

Look on the driver’s side dashboard, visible through the windshield․ It’s also typically located on the driver’s side doorjamb, on a sticker․ Additionally, the VIN is stamped on the vehicle’s registration and insurance documents․

Confirming the VIN’s accuracy is vital when servicing your Civic or filing any insurance claims․ Always cross-reference the VIN on the vehicle with the documentation to ensure consistency and avoid potential issues․

Understanding Your Vehicle’s Labels & Symbols

Your 2016 Honda Civic features numerous labels and symbols designed to convey important information․ These aren’t just decorative; they provide critical safety instructions and operational guidance․

Pay close attention to warning labels found throughout the vehicle, indicating potential hazards․ Symbols on controls explain their functions, while those on the instrument panel alert you to system status․

The owner’s manual details the meaning of each symbol, ensuring you understand their significance․ Familiarizing yourself with these visual cues promotes safe driving and proper vehicle maintenance, ultimately enhancing your ownership experience․

Operating Your Vehicle

Mastering your 2016 Civic’s operation involves understanding starting/stopping procedures, driving basics, and the instrument panel’s indicators – all detailed in the manual․

Starting and Stopping the Engine

The 2016 Honda Civic’s engine operation is clearly outlined in the owner’s manual, detailing the proper procedures for both starting and safely shutting down the vehicle․ It emphasizes ensuring the parking brake is engaged before starting, and familiarizing yourself with the ignition system․

The manual provides guidance on what to expect during the starting process, including normal sounds and indicator light behavior․ For stopping the engine, it stresses shifting into Park (P) or Neutral (N), and turning the ignition off․ Following these steps ensures smooth operation and prevents potential damage, contributing to the longevity of your Civic․

Driving Basics: Steering, Acceleration, and Braking

The 2016 Honda Civic owner’s manual dedicates a section to fundamental driving techniques, covering steering, acceleration, and braking for a safe and controlled experience․ It explains the responsive steering system, advising drivers on proper hand positioning and turning techniques․

Regarding acceleration, the manual details the operation of the gas pedal, emphasizing smooth and progressive application․ Braking instructions highlight the importance of applying firm, even pressure, and understanding the Anti-lock Braking System (ABS)․ Mastering these basics, as outlined in the manual, is crucial for confident and secure driving․

Understanding the Instrument Panel

The 2016 Honda Civic’s owner’s manual provides a detailed explanation of the instrument panel, crucial for monitoring vehicle performance and identifying potential issues․ It clarifies the meaning of each gauge, including the speedometer, tachometer, fuel level, and temperature indicators․

The manual also deciphers various warning lights and indicators, explaining what each signifies – from low oil pressure to airbag system malfunctions․ Understanding these symbols is vital for proactive maintenance and safe operation․ Familiarizing yourself with the instrument panel, as described in the manual, ensures informed driving and timely responses to vehicle needs․

Safety Features

The 2016 Civic’s manual details key safety systems, including airbags, seatbelt usage, and Vehicle Stability Assist (VSA), ensuring driver and passenger protection․

Airbag System Overview

The 2016 Honda Civic’s airbag system is a crucial safety component, designed to work with seatbelts to minimize injury during collisions․ The owner’s manual provides a comprehensive overview of the system, detailing the locations of airbags – front, side, and side curtain airbags – and their specific deployment characteristics․

Understanding the system’s limitations is vital; airbags are supplemental restraints and don’t replace proper seatbelt use․ The manual emphasizes the importance of always wearing seatbelts and correctly positioning occupants․ It also outlines potential risks associated with airbag deployment, particularly for children, and stresses following all safety precautions․

Proper maintenance and awareness of warning indicators are also covered, ensuring the system functions optimally when needed․

Seat Belt Usage & Safety

The 2016 Honda Civic owner’s manual strongly emphasizes the critical importance of seat belt usage for all occupants․ Seatbelts are the primary safety restraint system, significantly reducing the risk of severe injury or fatality in a collision․ The manual details proper seatbelt fitting procedures for adults and children, including guidance on using child restraint systems․

It highlights the legal requirements for seatbelt use and stresses that airbags are designed to work in conjunction with seatbelts, not as a replacement․ The manual also addresses potential hazards, such as improper seatbelt positioning or modifications, and provides clear instructions for inspecting and maintaining seatbelts․

Prioritizing seatbelt safety is paramount for a secure driving experience․

Vehicle Stability Assist (VSA) System

The 2016 Honda Civic’s Vehicle Stability Assist (VSA) system is a crucial safety feature, detailed within the owner’s manual․ VSA helps maintain control during challenging driving conditions, like sudden maneuvers or slippery surfaces, by selectively applying brakes to individual wheels․

The manual explains how VSA works, including the indicator light on the instrument panel, which illuminates when the system is actively engaged․ It clarifies that VSA isn’t a substitute for careful driving, and drivers should still adjust speed and driving style to suit road conditions․

Understanding VSA’s limitations and proper operation is key to maximizing its benefits and ensuring safe driving․

Maintenance & Care

The 2016 Civic’s manual outlines a recommended maintenance schedule, detailing fluid checks, replacements (oil, coolant), and tire care for optimal vehicle performance and longevity․

Recommended Maintenance Schedule

Your 2016 Honda Civic’s longevity relies on adhering to the recommended maintenance schedule, detailed within the owner’s manual․ This schedule covers essential checks and services at specific mileage intervals․

Regular oil and filter changes are paramount, typically every 7,500 to 10,000 miles with synthetic oil․ Tire rotations are advised every 5,000 miles to ensure even wear․

Inspect fluid levels – coolant, brake fluid, power steering fluid, and windshield washer fluid – routinely․ Air filter replacements are also crucial, along with periodic inspections of belts, hoses, and brakes․ Following this schedule helps prevent costly repairs and maintains optimal performance․

Fluid Checks & Replacements (Oil, Coolant, etc․)

Maintaining proper fluid levels is vital for your 2016 Honda Civic’s health․ Regularly check the engine oil using the dipstick, ensuring it’s within the recommended range․ Coolant levels should be inspected in the reservoir when the engine is cold․

Brake fluid, power steering fluid, and windshield washer fluid also require periodic checks and top-ups․ Honda recommends specific types of fluids; using the correct ones is crucial․

Oil changes are typically needed every 7,500-10,000 miles, while coolant flushes are recommended at longer intervals, as outlined in the owner’s manual․

Tire Pressure & Maintenance

Proper tire inflation is essential for safety and fuel efficiency in your 2016 Honda Civic․ The recommended tire pressure, found on a sticker inside the driver’s side doorjamb, should be checked monthly with a reliable gauge․

Maintaining correct pressure improves handling and extends tire life․ Regularly inspect tires for wear and tear, including uneven tread patterns, cuts, or bulges․

Rotation is key; Honda recommends rotating tires every 5,000-7,500 miles to ensure even wear․ Always adhere to the specified tire size and type for optimal performance․

Interior Features

The 2016 Civic’s interior boasts a user-friendly audio system, effective climate control, and seamless Bluetooth connectivity for phone integration and enhanced driving enjoyment․

Audio System Operation

The 2016 Honda Civic’s audio system offers a range of features for an enjoyable in-car experience․ Owners can explore AM/FM radio, CD playback, and auxiliary input options for diverse listening choices․

Bluetooth connectivity allows for wireless audio streaming from smartphones and other compatible devices․ The system typically includes steering wheel-mounted controls for convenient volume adjustment, track selection, and source switching․

Detailed instructions within the owner’s manual cover pairing devices, navigating menus, and customizing audio settings to personalize the sound to individual preferences․ Understanding these features enhances the overall driving experience․

Climate Control System

The 2016 Honda Civic’s climate control system provides comfortable cabin temperatures for both driver and passengers․ Manual or automatic climate control options are available, depending on the trim level, offering precise temperature regulation․

The system features controls for fan speed, temperature adjustment, and airflow direction․ Defrost and defog settings efficiently clear windshields for improved visibility in adverse weather conditions․

The owner’s manual details operation of these features, including recirculation mode for quicker cooling or heating, and provides guidance on maintaining optimal system performance․ Proper usage ensures a pleasant driving environment․

Bluetooth Connectivity & Phone Integration

The 2016 Honda Civic offers seamless Bluetooth connectivity for hands-free calling and audio streaming․ The owner’s manual provides detailed instructions on pairing your smartphone with the vehicle’s system, ensuring a secure connection․

Once paired, you can make and receive calls, access your phone’s contacts, and enjoy wireless music playback․ The system also supports audio streaming from compatible apps․

The manual explains voice command functionality, allowing control of audio and phone features without taking your hands off the wheel, enhancing safety and convenience during your drive․

Exterior Features

The 2016 Civic’s exterior features are detailed in the owner’s manual, covering lights, wipers, door locks, and the key system for optimal functionality․

Lights & Signals Operation

Your 2016 Honda Civic’s lighting system is comprehensively explained in the owner’s manual․ It details headlight operation, including high and low beams, as well as automatic headlight functionality if equipped․

The manual clarifies the use of turn signals, hazard lights, and parking lights, ensuring clear communication on the road․ It also covers the operation of fog lights, if your model includes them, and explains how to adjust headlight aim for optimal visibility․

Furthermore, the guide outlines bulb replacement procedures and provides information on any specific lighting features unique to the 2016 Civic, promoting safe and effective use of all exterior lights․

Windshield Wipers & Washers

The 2016 Honda Civic owner’s manual provides detailed instructions on operating the windshield wipers and washers, essential for maintaining clear visibility in various weather conditions․ It explains the different wiper settings – low, high, intermittent – and how to adjust them based on rainfall intensity․

The manual also covers the windshield washer fluid system, including how to activate the spray and ensure the reservoir is adequately filled․

Information on rear wiper operation (if equipped) and wiper blade replacement is also included, ensuring optimal performance and safety․ Proper use and maintenance, as outlined, contribute to a safer driving experience․

Door Locks & Key System

The 2016 Honda Civic owner’s manual details the operation of the vehicle’s door locks and key system, covering both manual and power locking features․ It explains how to use the interior door lock switches and the remote keyless entry system for convenient access and security․

The manual also provides instructions on programming additional remote transmitters and understanding the various key functions, including unlocking the doors and trunk․

Information regarding the keyless entry system’s operation, along with troubleshooting tips for common issues, is included to ensure a smooth and secure ownership experience․

Troubleshooting & Emergency Procedures

The 2016 Civic manual offers guidance for jump-starting, flat tire procedures, and interpreting warning lights․ It’s a vital resource for roadside assistance and safety․

Jump Starting Procedures

If your 2016 Honda Civic’s battery is depleted, a jump start can get you going․ The owner’s manual details the correct procedure, emphasizing safety precautions․ First, position a second vehicle close enough for the jumper cables to reach, but ensure the vehicles aren’t touching․

Connect the cables in the specified order: positive (+) to positive (+), and negative (-) to a grounded metal surface on the disabled Civic, not the battery terminal․ Start the assisting vehicle, then attempt to start your Civic․ If successful, let it run for a while before disconnecting the cables in reverse order․ Always consult the manual for specific instructions and warnings․

What to Do in Case of a Flat Tire

Encountering a flat tire with your 2016 Honda Civic requires a calm and methodical approach, as detailed in the owner’s manual․ First, safely pull over to a level surface away from traffic and activate your hazard lights․ Locate the spare tire, jack, and lug wrench – their locations are specified in the manual․

Loosen the lug nuts before jacking up the vehicle, then raise the Civic until the flat tire is off the ground․ Remove the lug nuts completely, replace the flat with the spare, and tighten the lug nuts in a star pattern․ Lower the vehicle and fully tighten the nuts․ Consult the manual for torque specifications․

Warning Lights & Indicators – What They Mean

The 2016 Honda Civic’s instrument panel utilizes various warning lights and indicators, each signaling a specific vehicle condition, as thoroughly explained in the owner’s manual․ Understanding these symbols is crucial for proactive maintenance and safe driving․ Lights range from critical warnings – like the oil pressure or engine check light – requiring immediate attention, to informational indicators․

The manual provides detailed descriptions of each light, outlining potential causes and recommended actions․ Ignoring warning lights can lead to more significant damage․ Familiarize yourself with the meanings to address issues promptly and maintain your Civic’s optimal performance․

Warranty Information

The 2016 Honda Civic is covered by a basic vehicle warranty and a separate powertrain warranty, details of which are outlined in the owner’s manual․

Basic Vehicle Warranty Details

The 2016 Honda Civic’s basic vehicle warranty provides coverage for defects in materials or workmanship for a specified period․ Typically, this encompasses 3 years or 36,000 miles, whichever comes first․ This warranty covers a wide range of components, ensuring peace of mind during the initial ownership period․

It’s crucial to review the owner’s manual for the precise terms and conditions, including what is covered and any exclusions․ Regular maintenance, as outlined in the manual, is often required to maintain warranty validity․ Keeping detailed records of all servicing is highly recommended for any potential warranty claims․

Powertrain Warranty Information

The 2016 Honda Civic also includes a powertrain warranty, offering extended coverage for critical components․ This typically extends to 5 years or 60,000 miles, whichever occurs first․ The powertrain encompasses the engine, transmission, and drivetrain – essential elements for vehicle operation․

This warranty protects against significant mechanical failures within these core systems․ As with the basic warranty, adherence to the recommended maintenance schedule is vital for continued coverage․ Consult the owner’s manual for a comprehensive list of covered components and any specific requirements to uphold the warranty’s validity․

Specifications

The 2016 Honda Civic’s specifications, detailed in the owner’s manual, cover engine details, dimensions, and capacities․ These provide essential technical information for owners․

Engine Specifications

The 2016 Honda Civic offered multiple engine options, and the owner’s manual provides precise details for each․ Typically, base models featured a 2․0-liter inline-4 engine producing around 158 horsepower and 138 lb-ft of torque․

Higher trims often included a more powerful 1․5-liter turbocharged inline-4, delivering approximately 174 horsepower and 177 lb-ft of torque․ The manual details displacement, compression ratio, fuel system type, and recommended fuel grade for optimal performance․

Understanding these specifications is vital for proper maintenance and ensuring your Civic operates efficiently and reliably․ Refer to your specific model’s manual for accurate data․

Dimensions & Capacities

The 2016 Honda Civic owner’s manual outlines crucial dimensional and capacity information․ Sedan models typically measure around 182․3 inches in length, 73 inches in width, and 55․7 inches in height․ The coupe is slightly shorter at approximately 179․4 inches․

Interior passenger volume is around 97․8 cubic feet for the sedan, and 96․8 for the coupe, offering comfortable seating․ Trunk capacity varies; the sedan boasts 15․1 cubic feet, while the coupe offers 11․9 cubic feet․

Fluid capacities, like oil (3․7 quarts) and coolant, are also detailed within the manual for accurate maintenance․